Holy shit balls you guys! This has been a crazy ride getting this episode up for you (but we think you will find it worth the wait… at least we hope you do). The video situation ended up being a fairly daunting without Katie’s computer unable to handle the process of video editing. As it stands at this very moment we are not even sure the videos are going to upload to YouTube (so this might be a moot point), but we are doing our best. Long story short, because Katie filmed the video on her iPhone (the good camera quit working months ago) and it is a 4s, we had to use the Dropbox app and upload from her phone to Dropbox and then download from Dropbox to her iPad for editing, and then upload to YouTube (which we are waiting on now). We won’t bore you with anymore of that shit though. On to the good stuff!
This is going to be a really long post so quickly; here are some links that were mentioned in this episode.
To see all of the swoon worthy art we put on the Pintrest board for this episode click here.
If you would like to read the dummies.com article Katie cited during the show to learn more about Ohms Law and electronics measurement click here.
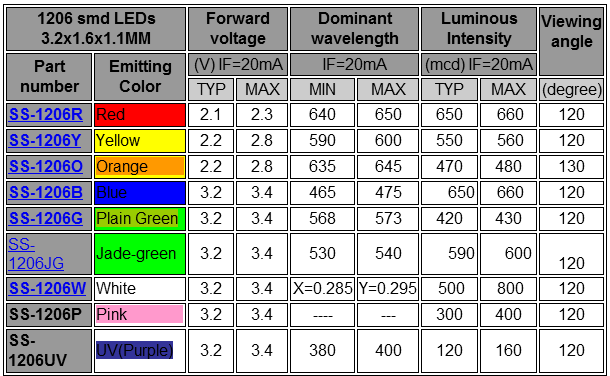
Here is the handy little chart that tells you what volt LEDs are according to their color.
And you can buy the tools and components mentioned during the show at American Science and Surplus http://www.sciplus.com/ and Radio Shack http://www.radioshack.com/, as well as your local hobby shops (which we recommend) and/or good ol’ Amazon.
Before we get to the tutorial watch the video Katie made about planning your project (we apologize for the poor quality of this video, we are doing the best we can with what we have right now).
Here is the pieced together video on how to use a breadboard to test your LED circuit… again; sorry it is a bit choppy and poor quality, but this is kind of one of those “it is what it is” situations.
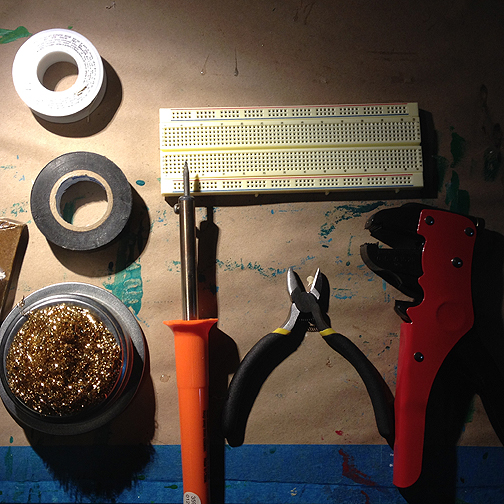
And here are all the tools you will need (they are all pretty self expletory).
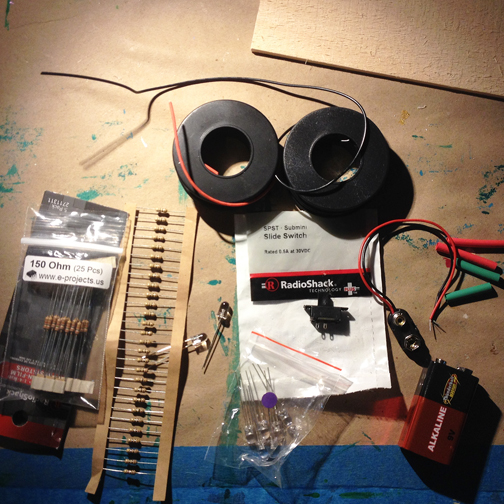
And here are the supplies.
Now that you have a visual to go along with everything The Gals talked about at the beginning of the show, here is the process of wiring a simple LED circuit into your art work.
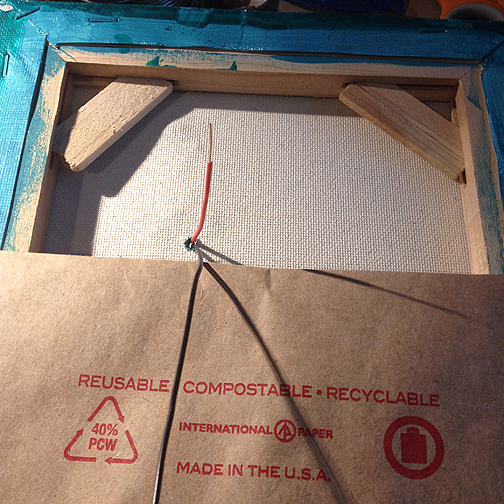
For the piece Katie was working on she had to wire the LED into the doll she was altering before beginning the painting process because once it was painted it would make it impossible to take apart again without destroying the artwork. She only needed the LED in the doll because finishing the circuit would have meant attaching the doll to the canvas… she got around that by leaving long wires coming out the back that she later clipped when finishing her wiring.
You may not do things in this order. Normally when building a circuit Katie begins at the positive side of the circuit with the switch and power source, then resistors, then positive side of LED, then negative side to the negative side of batter and switch… that is really what she did here but just had the LED prewired.
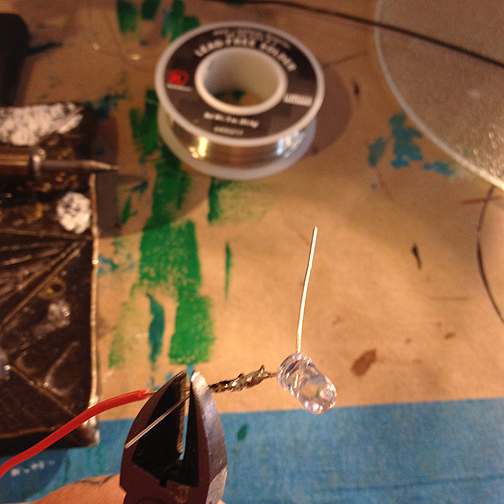
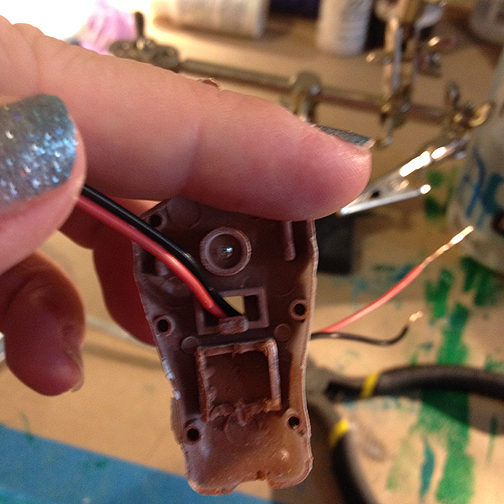
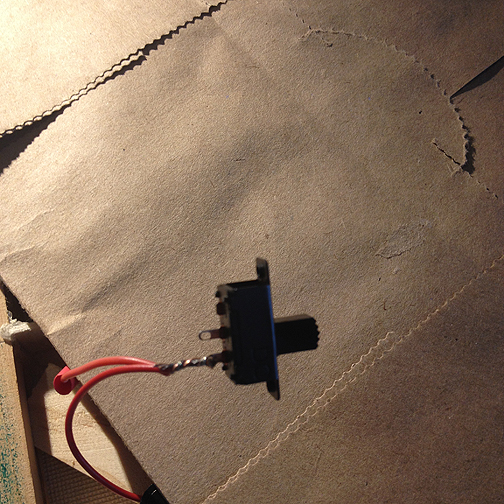
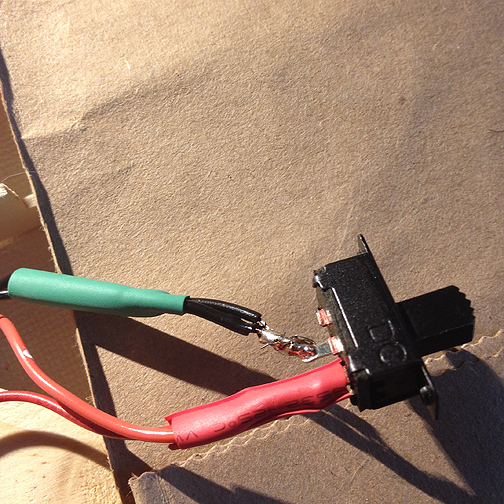
To do this, make sure you know which side of your LED is positive, then twist your red wire and positive leg of LED together and solder them into place (the third hand helps a lot in situations where it is suitable to use it).

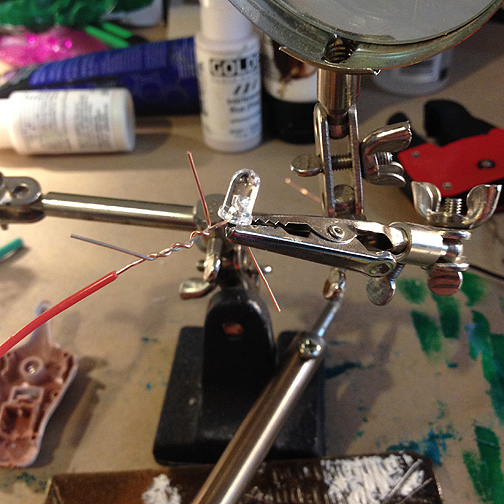

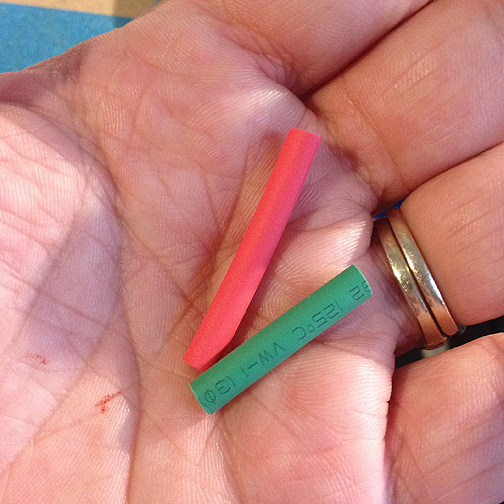
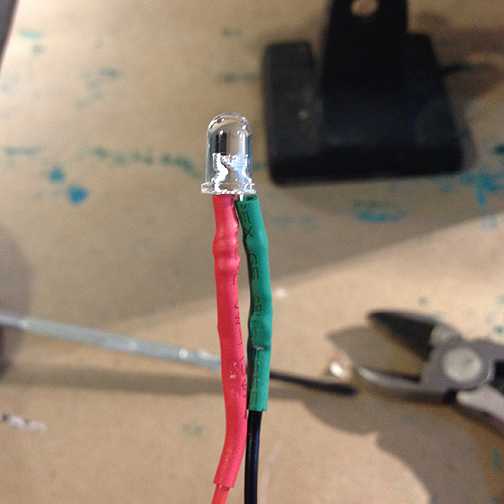
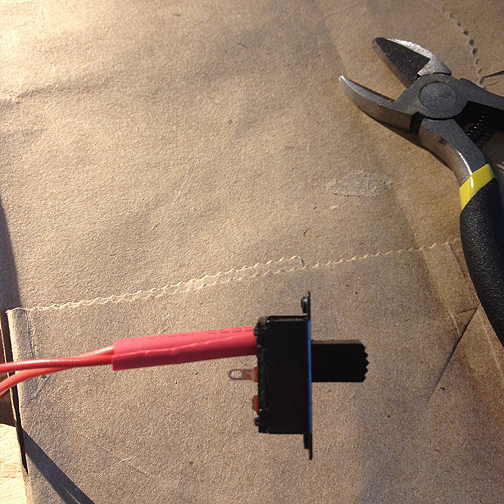
Snip ends close to solder and try to nip sharp spots flush, slide shrink tubing up to cover all bare wire and shrink into place with heat gun. Repeat process with black wire on negative side.

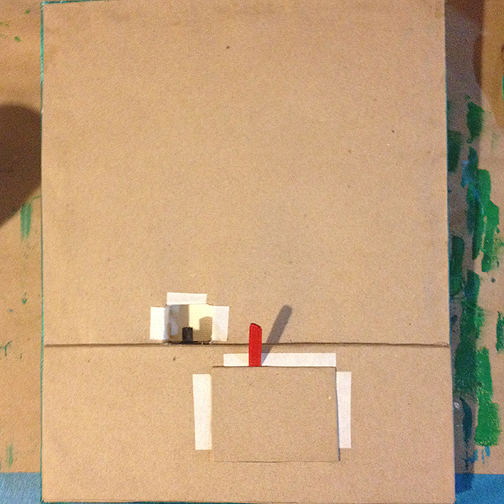
These next steps won’t necessarily apply to your projects but including them gives a good example of planning your circuit and how that circuit is completed through the art piece. The doll Katie used unscrews in the back and already has an additional hole in the back, making it possible to run the wires through the doll’s torso and into the translucent, violet mermaid tail once attached. Here you can just see how Katie was able to run those wires through and how they look once the doll is screwed back together.
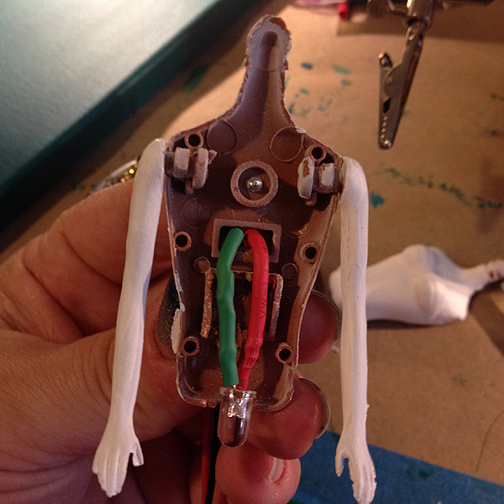

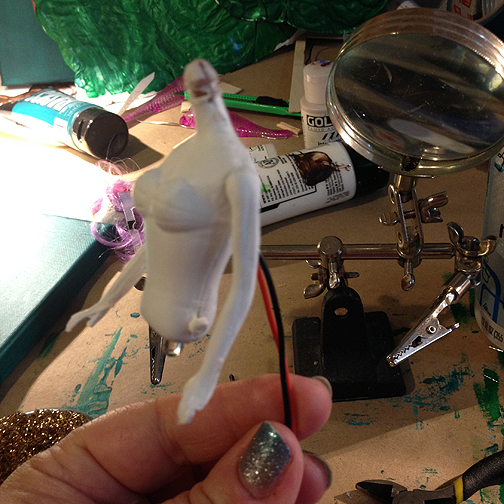
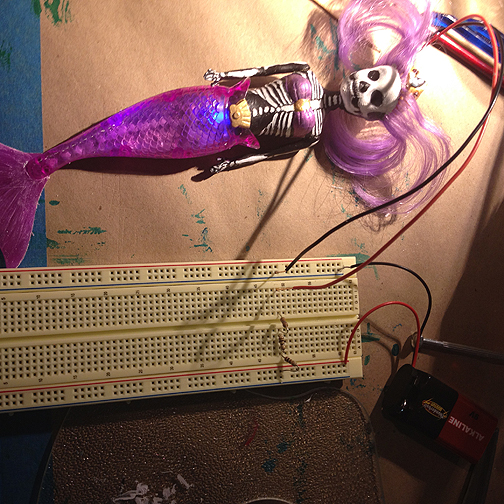
It is important to check your wiring before moving forward to steps that make it more difficult to replace/repair wires that have loosened or bulbs that have burnt out. Case in point: Katie was trying to show off how cool the light looked and got a bit careless, hooking the wires up directly to the power supply rather than taking the time to plug everything back into the breadboard. She blew out her LED and had to repeat the above steps before continuing. Here you can see tests checking the LED prior to painting the doll, which seals the seams, and again before attaching the completed doll to the canvas and beginning wiring.

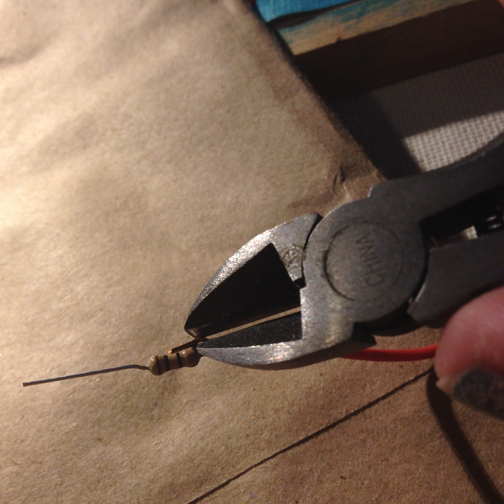
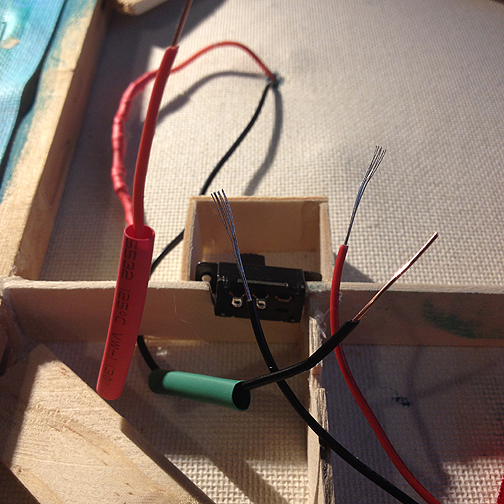
In the next steps Katie completes the circuit. First she clips the long wire so it is short enough to work with and then, just as she did with the LED, she twist the resistors around the wire and solders them into place, taking care to clip the wires down at each solder, and then twisting the next resistor into place. This process repeats until all of the resistors needs have been added and red wire is attached to the last one in the circuit.

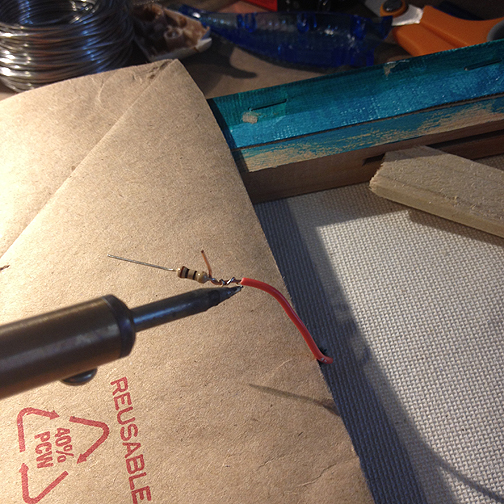
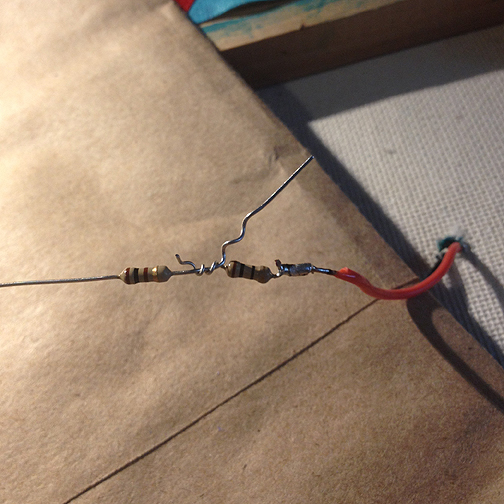
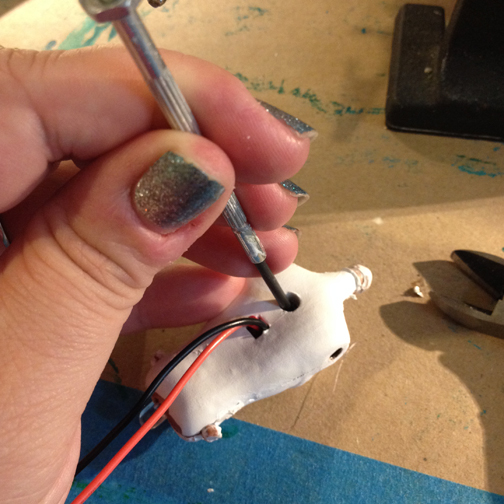
Exposed wires and solders must always be covered with electrical tape or shrink tubing. Although electrical tape is always an option, Katie prefers the nice clean look and secure coverage of shrink tubing.
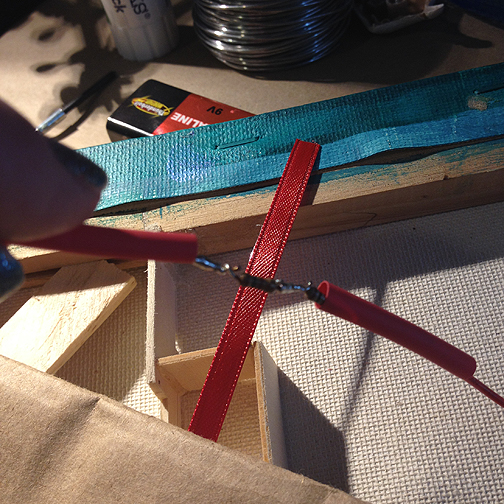
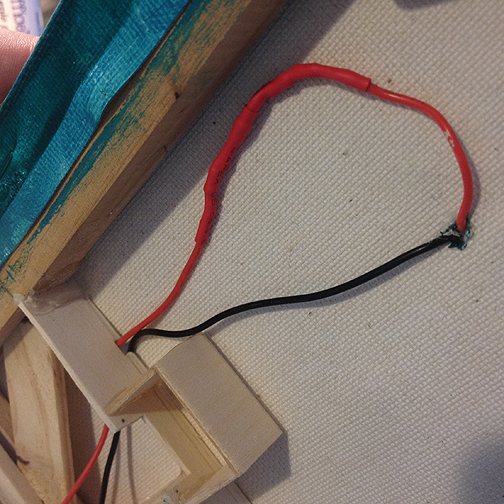
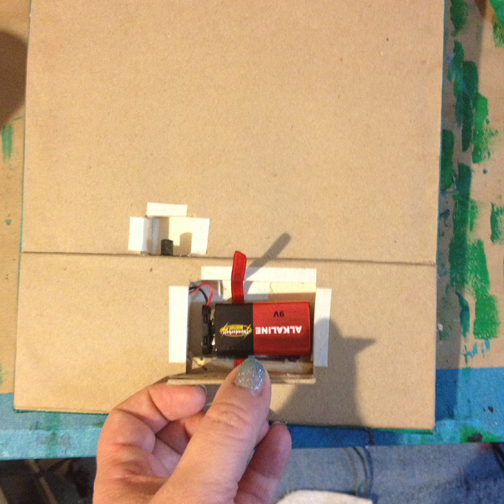
With the resistors in place, Katei was able to finish her circuit by soldering the wires from the power supply and LED to the switch; first attaching the positive, then the negative and applying shrink tubing to both. Take care to make sure the shrink tubing buts up against the switch box in this step as this is a likely spot for wires to touch causing a short circuit.
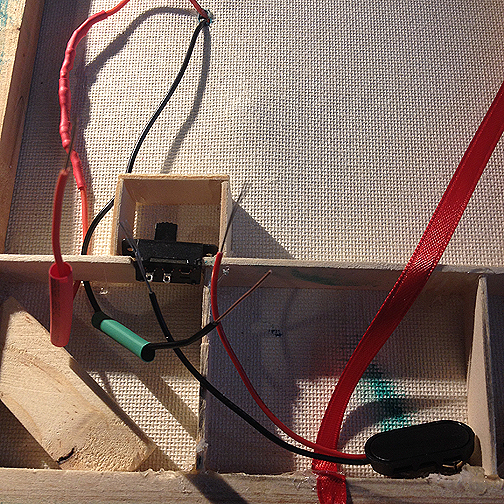

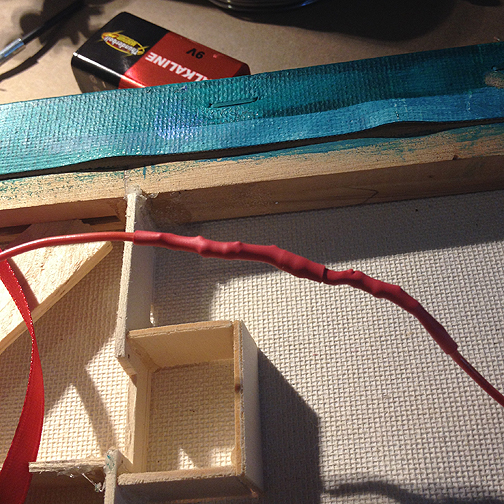
It is a good idea to turn the switch off and on a few times just to make sure everything is still working as it should but other than final testing, the circuit is complete. Boom! Proceed with closing in your wiring however you have planned keeping in mind that batteries need occasional replacing so there has to be a way to easily access the battery.


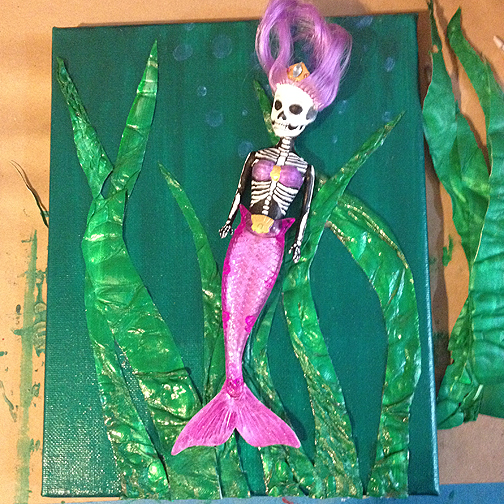
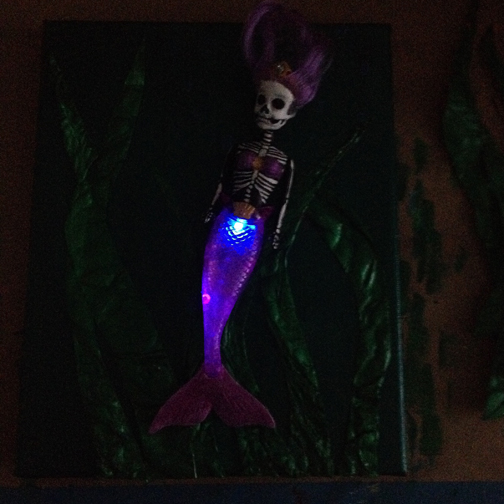
This piece isn’t quite finished yet but for the purposes of this tutorial it is complete enough to show here (Katie has more seaweed to add and she is going to do something with her hair). We just wanted you to see it lit up in the art piece. You can check Katie’s art blog or Katie Cahill Art on Facebook to see he finished piece in a few days.

WHEW!!! It has been a marathon from hell around here for the last three days getting that tutorial finished! We hope it has been helpful and if you have any questions or comments you can email The Gals at twoartsygals@gmail.com. You can also leave a voice mail for The Gals at 503-395-7190. We love hearing from listeners! You can also connect with The Gals on all of our social media accounts. Subscribe to the show on iTunes and Stitcher to have fresh episode automatically download to your listening devices; and leave us some positive feedback while you are there so other people know how awesome the show is.
Next week we begin our month of Halloween themed episodes and we are all freaking out about it around here because HALLOWEEN!!! The Gals kick off our October full of awesome with an awesome interview with Lisa Vollrath of Ten Two Studios. She spent her reckless youth as a costume designer at theaters all over the country and she gave us some great advice about designing our own Halloween costumes and tells us what kind of Halloween goodies she has going on over at Ten Two Studios. So until next… make some cool shit, yo!