This is going to be a quick and dirty post, dear listeners. It is like two weeks late… almost three! Katie is on the mend and gets a little better every day. She thanks you all for your understanding and doesn’t want to make you wait any morel so here is the post for our snow globes episode back on December 4th.
Check out our Pintrest board for this episode here.
Katie told us all about the cute mini snow globes she made for an ornament swap she was involved in. These are the process photos and steps she took for you.
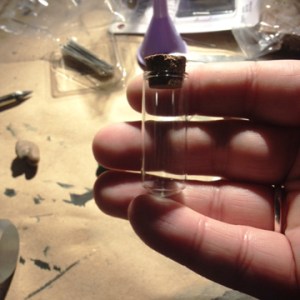
Prepare your tiny glass vial by washing it inside and out and allowing to air dry.
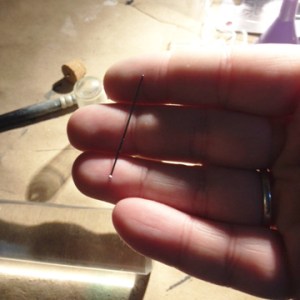
You will need a head pin to create a hook in the top of your snow globe ornament.
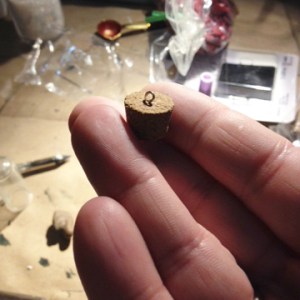
Poke headpin through cork for your vial from bottom; cut off and bend headpin to create loop that will allow you to insert ornament hook or ribbon.
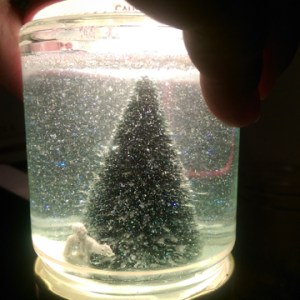
![Create tiny tree from femo clay and bake according to instructions. [Tip: To test size place your tree on flat surface and make sure your vial can be placed over the top of it with plenty of clearance around and above tree.]](https://twoartsygals.com/wp-content/uploads/2015/12/4sg.jpg?w=300&h=300)
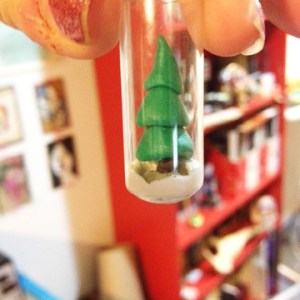
Create tiny tree from femo clay and bake according to instructions. [Tip: To test size place your tree on flat surface and make sure your vial can be placed over the top of it with plenty of clearance around and above tree.]
![Use silicone tile grout to adhere your tree into the bottom of your vial taking care to not get the grout on the sides [Tip: I used a disposable piping bag to get the grout into the bottom of the vial without glopping it all over.]](https://twoartsygals.com/wp-content/uploads/2015/12/5sg.jpg?w=300&h=300)
Use silicone tile grout to adhere your tree into the bottom of your vial taking care to not get the grout on the sides [Tip: I used a disposable piping bag to get the grout into the bottom of the vial without glopping it all over.]
Situate your tree so that it is straight and looks the way you would like it to and allow grout to cure for full time. Once cured you can add a small amount of glitter, a few drops of glycerin, and distilled water. Place cork in top and dip top in sealing wax to ensure a good seal.
Here is a little video of the finished ornament. Katie made five of these and did manage to fix the wax issue she was having by melting it with a small torch. We recommend dipping the ornament into the wax rather than attempting to pour it over as Katie did the first time. Just make sure you use a pin to clear the loop in the top. Even better, use a lighter or torch to clear the wax from the loop all together.
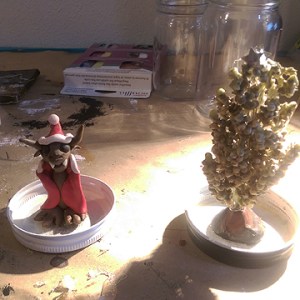
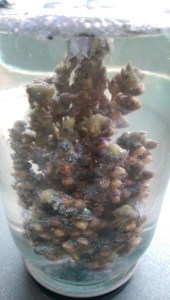
Here are some fun process shots of Loni’s tree and Krampus snow globes.
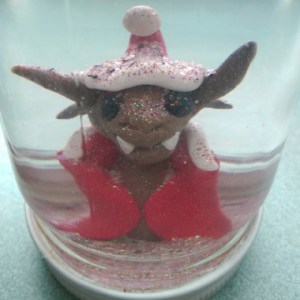
And here is a nice close up of Katie’s zombie snow globe.
Loni made some fun little vides for you guys so you can see the snow globes snowing.
Like we said, this is going to be quick and dirty! You already know that next week’s show talks about granny squares because it has already posted… we hope you experimented with snow globes and made some really cool shit! As always, you can email The Gals at twoartsygals@gmail.com and you can always reach them via FB or our other social media accounts. Subscribe to the show on Stitcher and iTunes! You guys are all awesome!